

Products
The Products section is the register of every item your business handles: what is sold to the customer, and what is consumed as a raw material in preparation. This is where you set the price, tax, category and unit of measure for each item.
Browsing products
The main screen lists every product with its price. Above the list are tools for reaching an item quickly:
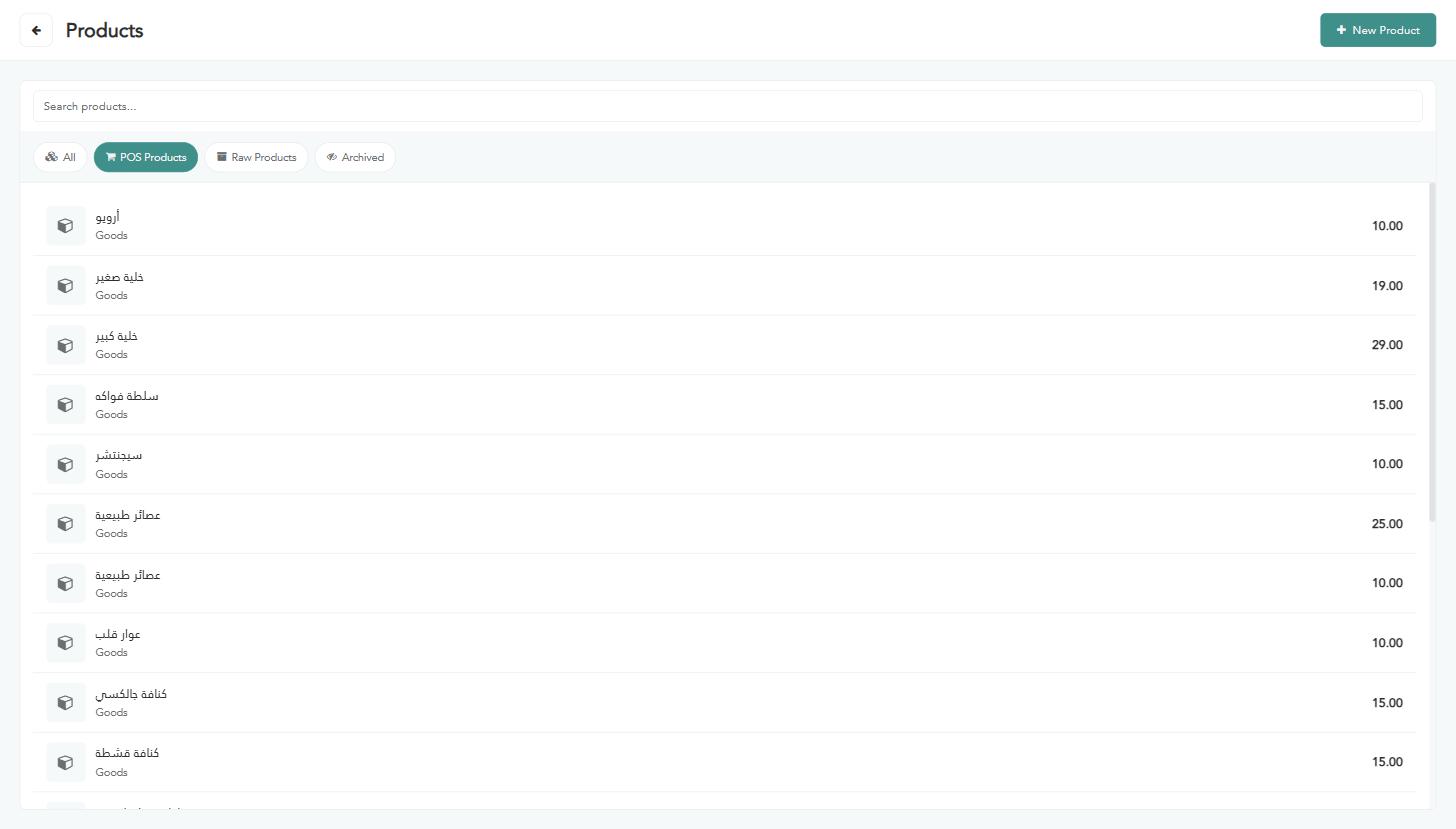
Search field — search by product name.
All — show every product with no filter.
POS products — only products offered for sale in the cashier app.
Raw products — raw materials not intended for direct sale.
Archived — products taken out of service.
1. The two product types
When you click “New product” you are first asked to choose the product type, and that choice determines which fields appear next:
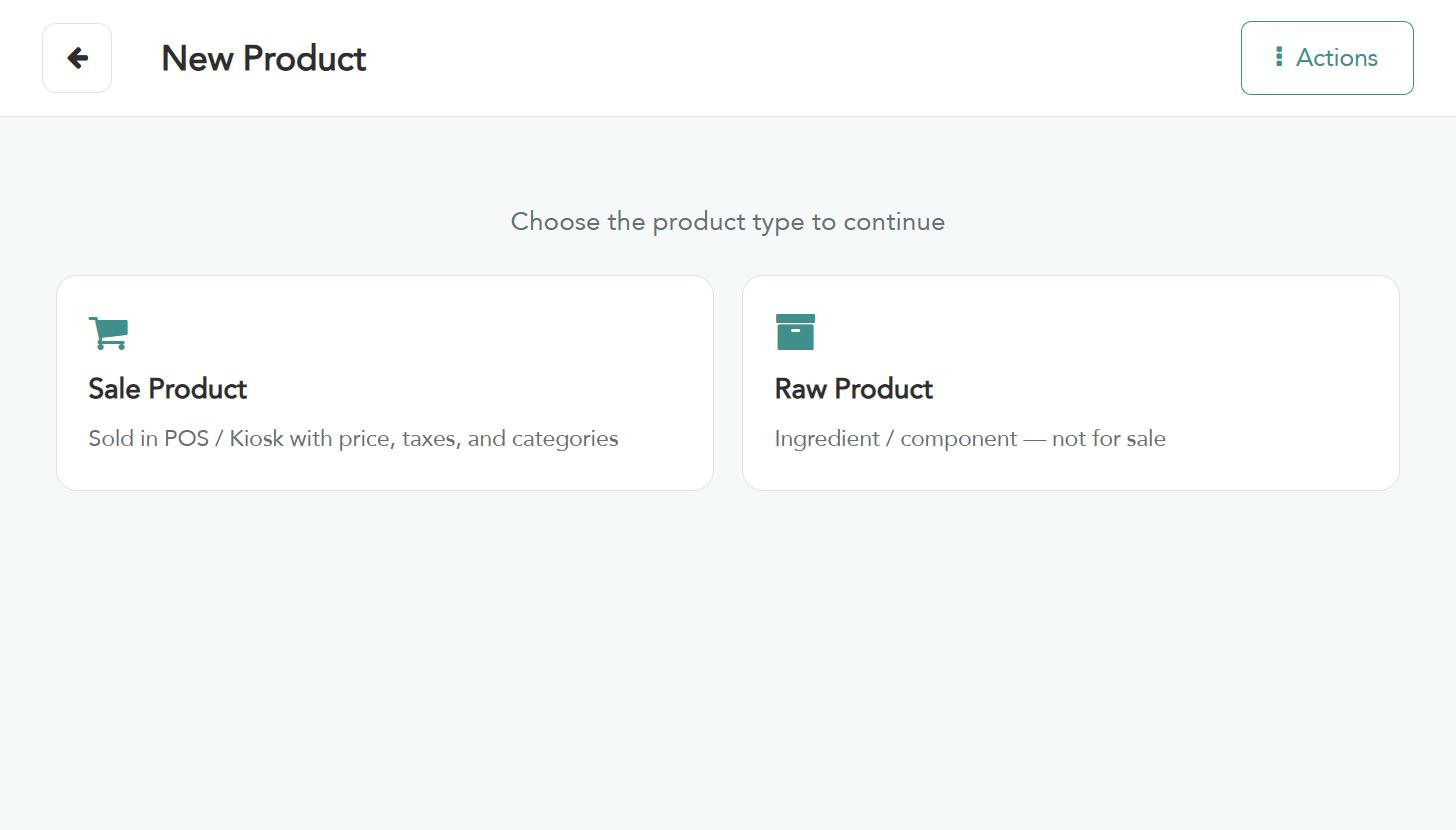
Product for sale — sold at the point of sale or self-order, and has a price, taxes and a display category.
Raw product — a component or raw material not meant for sale, so it has no sale price and no POS category.
A raw material is not sold directly, but it is consumed through Bills of Materials when the composite product is sold or manufactured.
2. Creating a product for sale
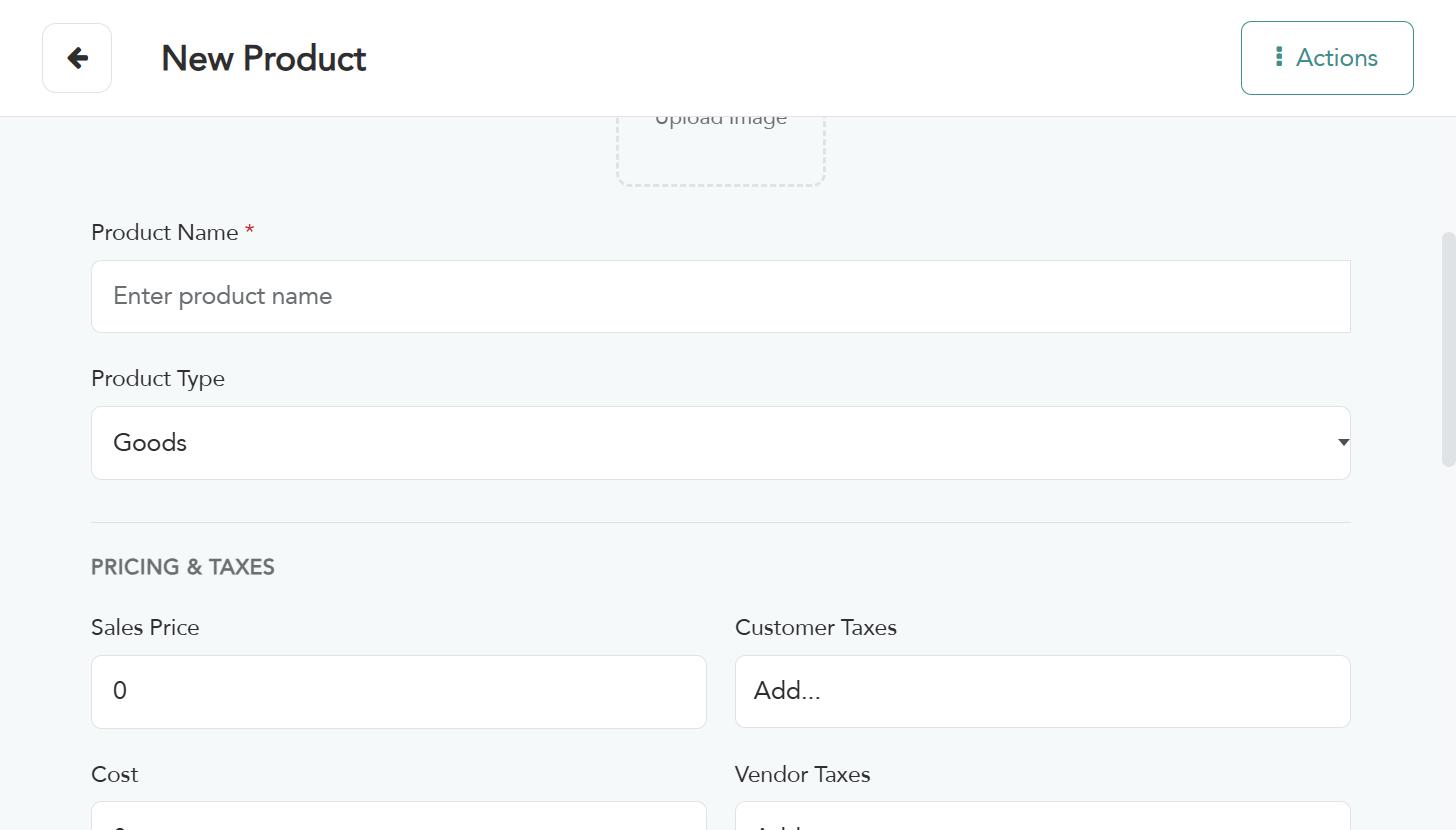
After choosing “Product for sale”, the details screen appears, divided into groups. Fill in the fields as follows:
Basics
“Upload image” — the product image as the cashier sees it (optional, but recommended to speed up selection).
“Product name” (required) — the name shown at the point of sale and on the receipt.
“Product type” — choose “Goods” for a physical item, or “Service” for something not stocked, such as a delivery fee.
Pricing and taxes
“Sale price” — the price shown to the customer.
“Customer taxes” — the sales tax applied on sale (for example 15%).
“Cost” — the cost of buying or preparing the item, used to calculate profitability.
“Vendor taxes” — the purchase tax applied when buying from the supplier.
If you pick a tax of the “tax included” type, the tax-excluded amount appears right below the price, calculated automatically — check it to confirm the pricing is correct.
Point of sale
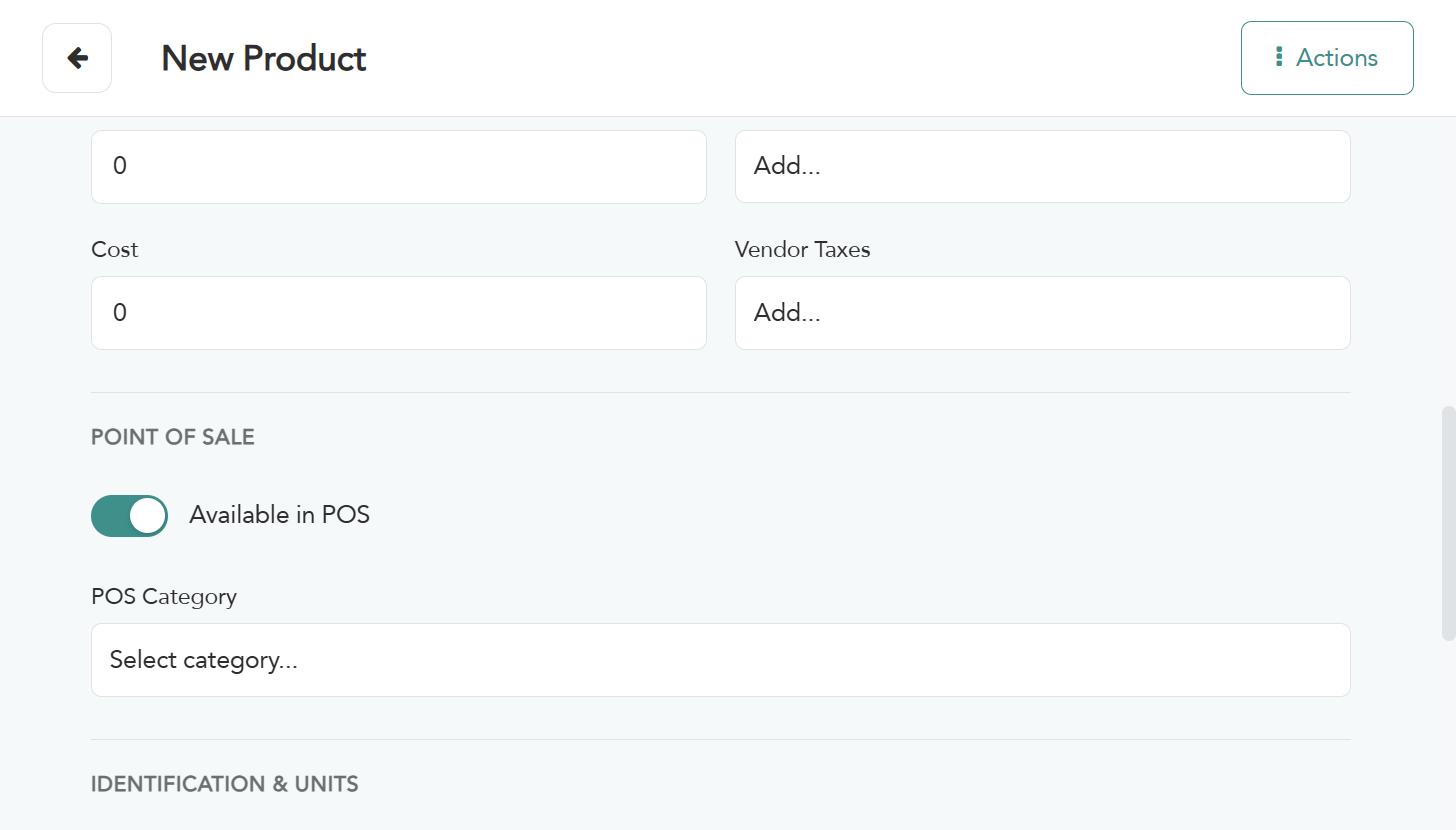
“Available in the cashier app” — a toggle; switch it off to hide the product temporarily without deleting it.
“POS category” — the category the product appears under on the cashier screen.
Identification and units
“Internal reference” (optional) — an internal code identifying the item (for example PROD-001).
“Barcode” (optional) — the barcode number, so it can be scanned at checkout.
“Unit of measure” — the unit the item is sold in (piece, kilogram, litre…).
“Advanced options” — opening this reveals the “Purchase unit of measure” field, for items bought in one unit and sold in another.
Warning: The unit of measure and the purchase unit of measure must belong to the same category (weight with weight, volume with volume), otherwise conversion between them is not possible.
3. Attributes and variants
Variants let you sell multiple versions of the same product without creating a separate product for each — such as “Small” and “Large” of the same juice.
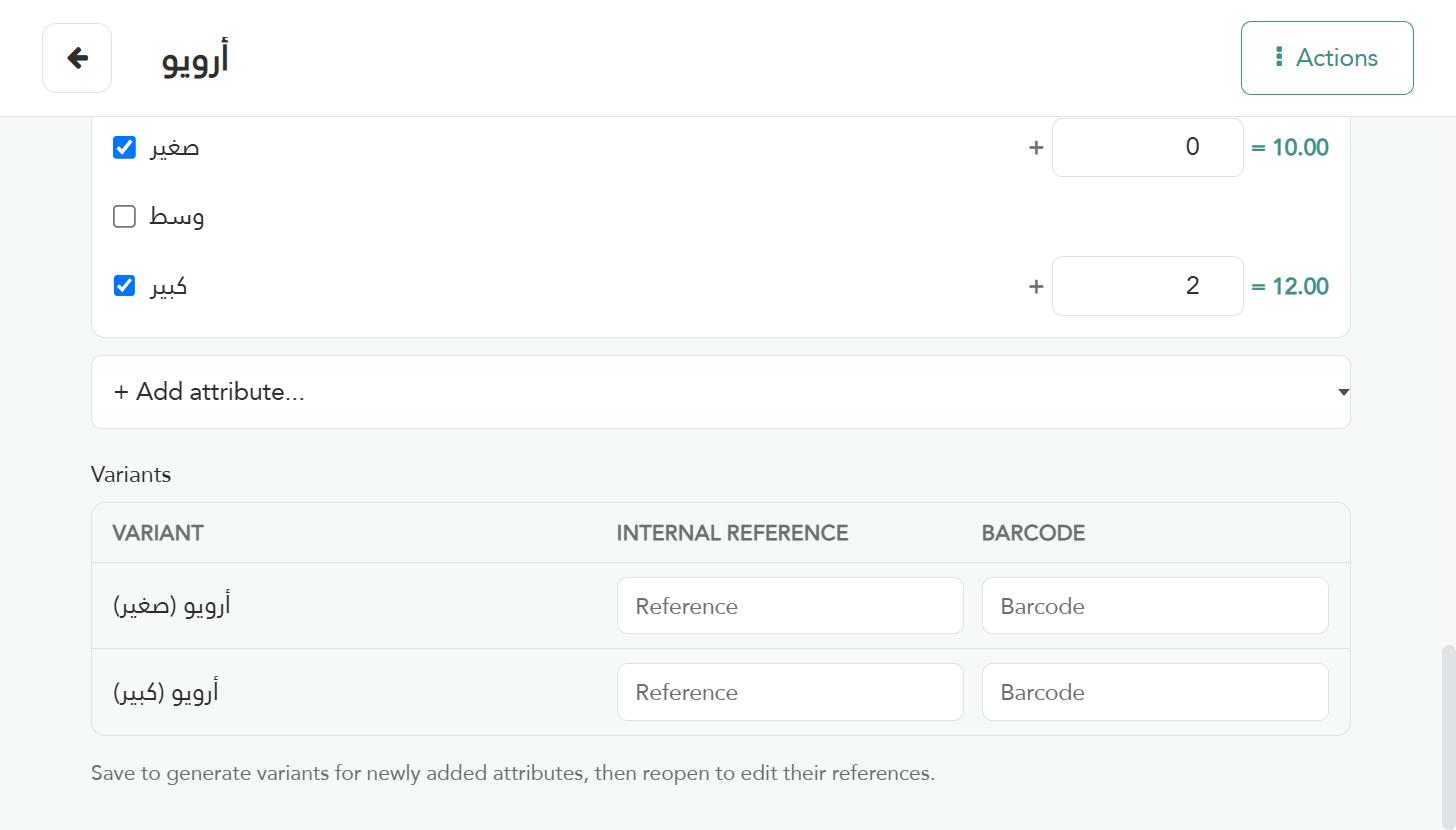
From the “Add attribute…” list, choose the attribute you need (for example: Size).
Select the values that apply to this product (for example: Small, Large).
Next to each value its final price appears, calculated from the base sale price plus the value's extra price.
Save the product — the variants are then created and a table of them appears.
Reopen the product to edit the “Internal reference” and “Barcode” of each variant individually.
Variants are only created after saving. If the table does not appear, make sure you saved the product after adding the attribute.
4. Creating a raw product
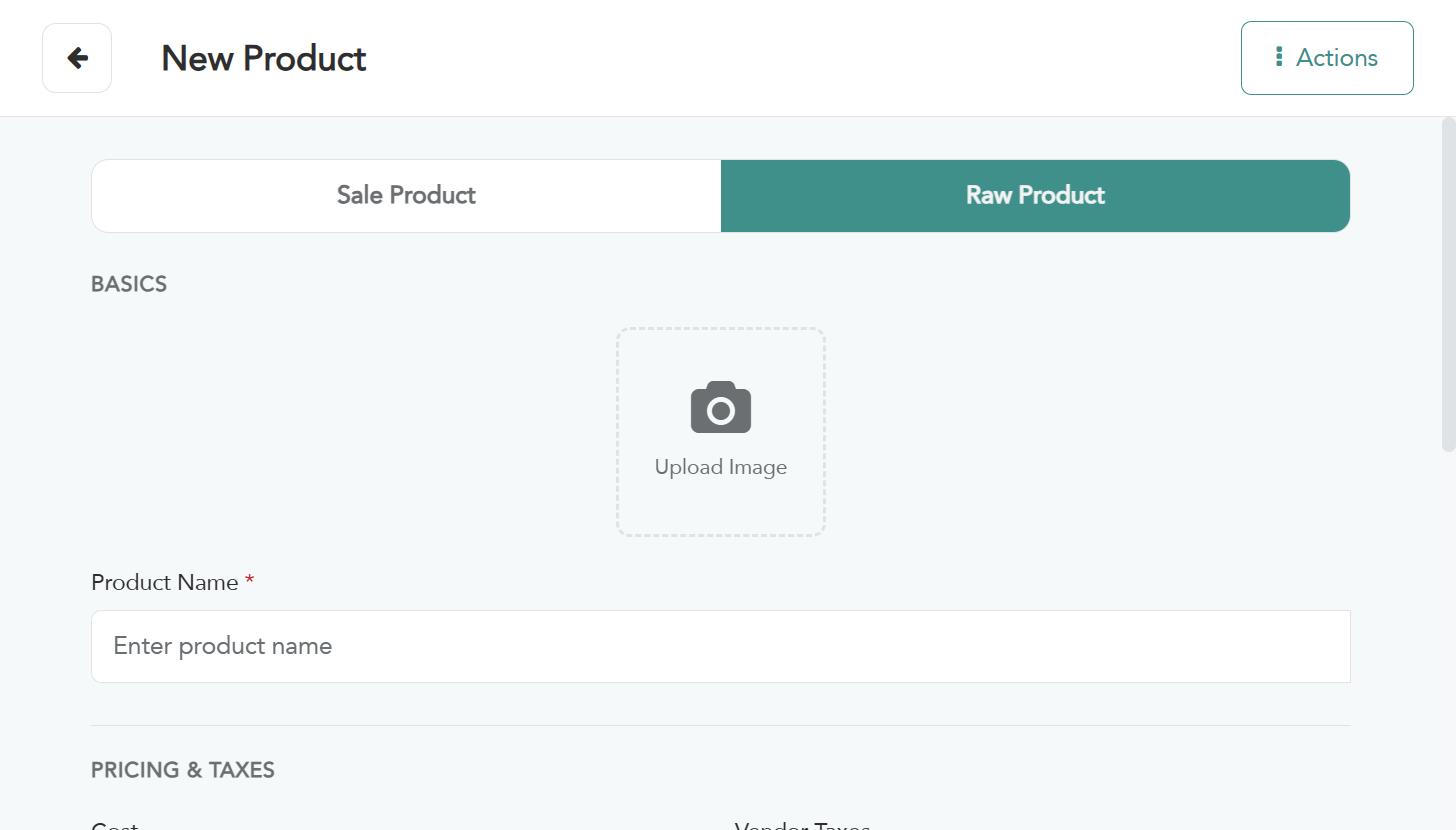
Choose “Raw product” when adding a component that is not sold on its own. The screen is simpler: the sale price, customer taxes and the entire point-of-sale group disappear, while cost, vendor taxes and unit of measure remain.
After creating your raw materials, go to Bills of Materials to link them to the finished product they go into.